 |
ZebraWeb.org Sports Officials Operations System™
"Empowering Sports Officiating™ " |
|
Edit a movie with voice-over in Nero Vision
(single-click on hyperlinks
single-click on small images for larger version)
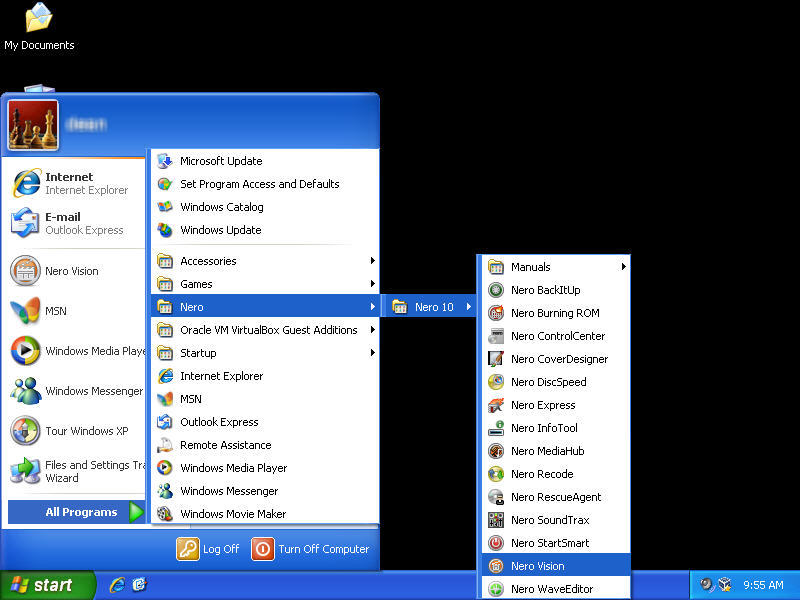
- From the Start Menu, launch Nero Vision
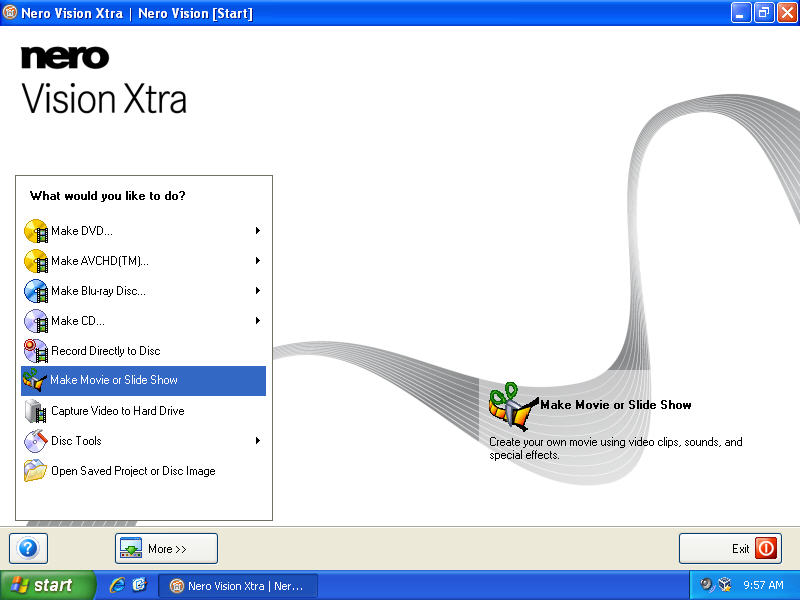
- Choose Make Movie:
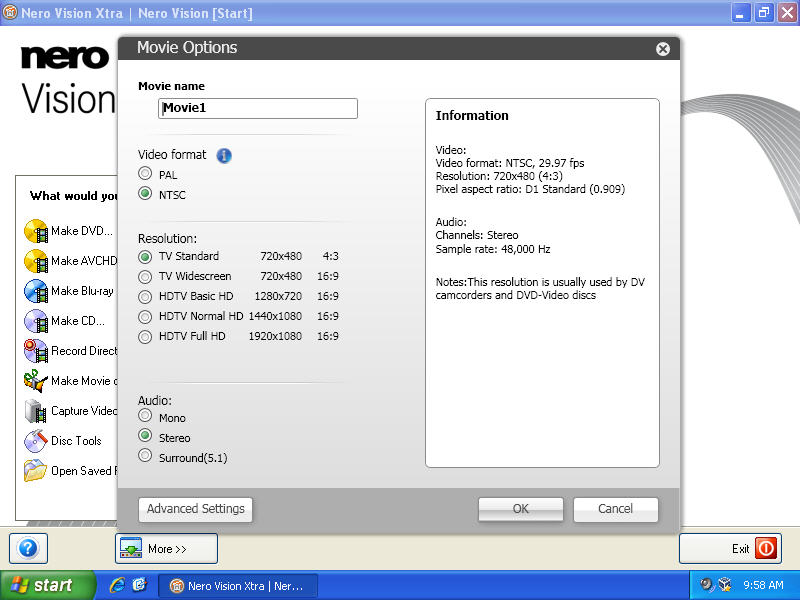
- You can leave the default options alone and press OK
- If there are already media files in the list and you'd like to remove them (only from the project, not your computer), Right-click on them and choose Remove
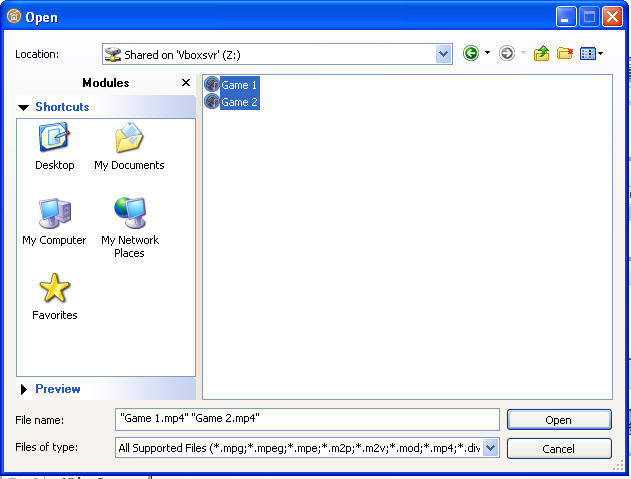
- To add movies, click on the import button and choose import files
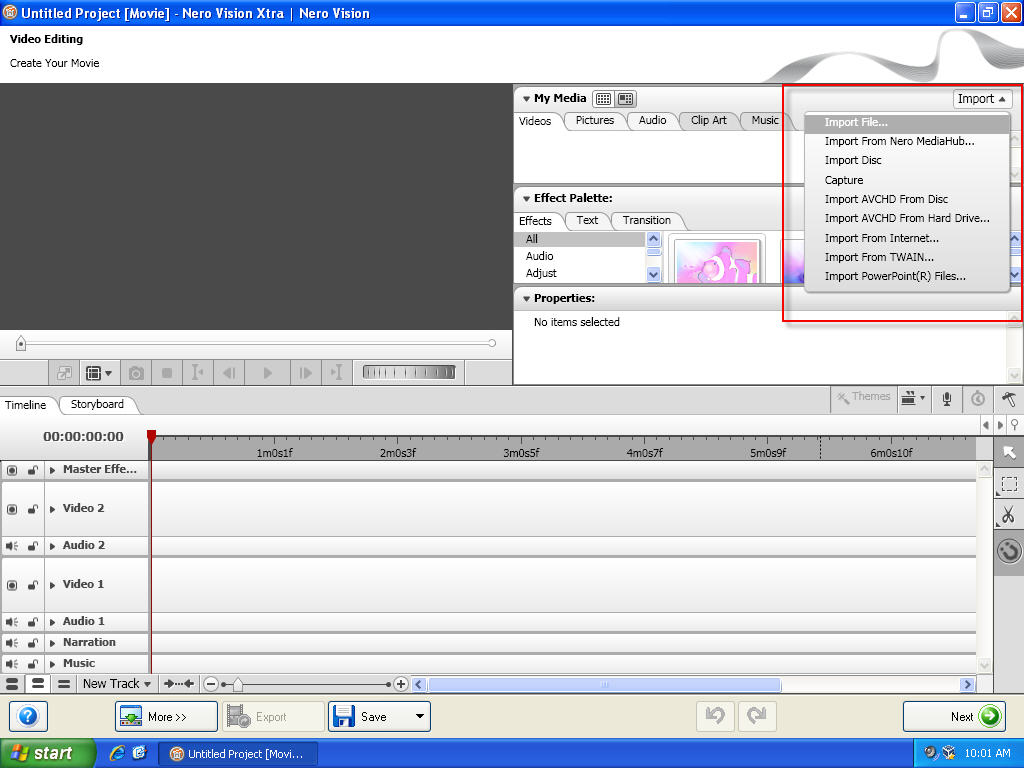
- Browse to where you saved your movies and choose them. Use ctrl-click to select multiples if needed. Click the "Open" button
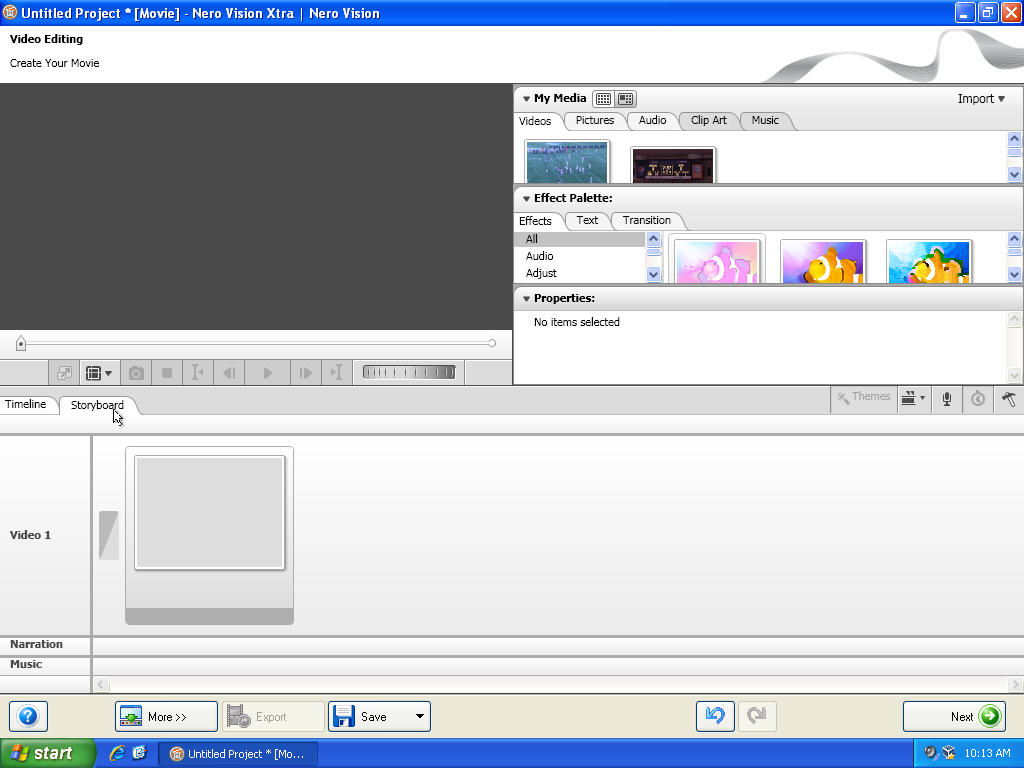
- Change to Storyboard view by clicking the "Show storyboard" tab
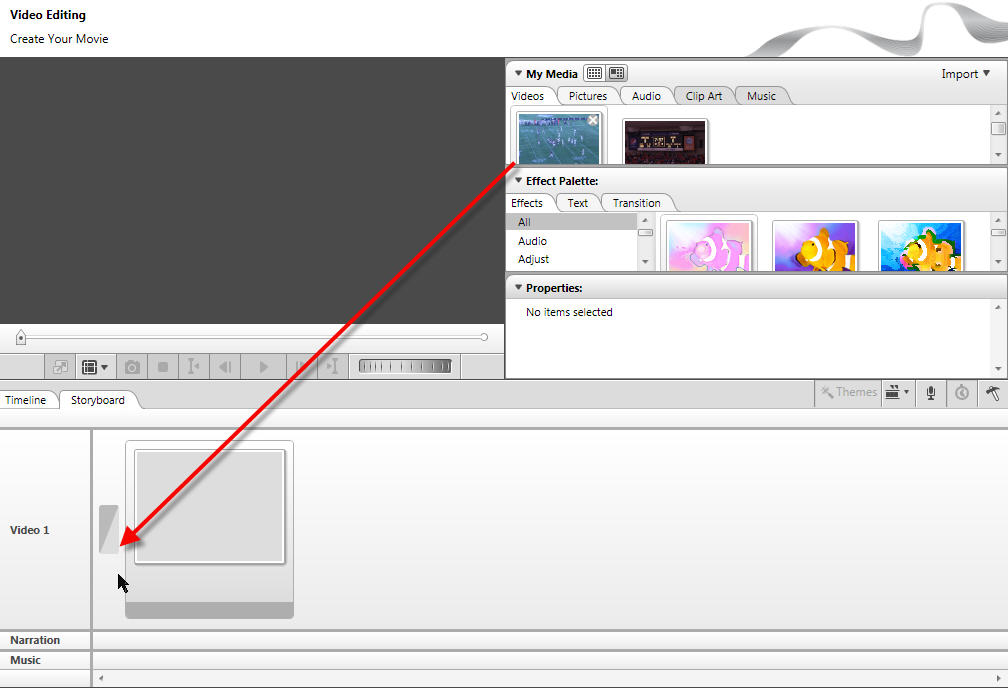
- Insert your first movie into the timeline by dragging it from the list to the storyboard
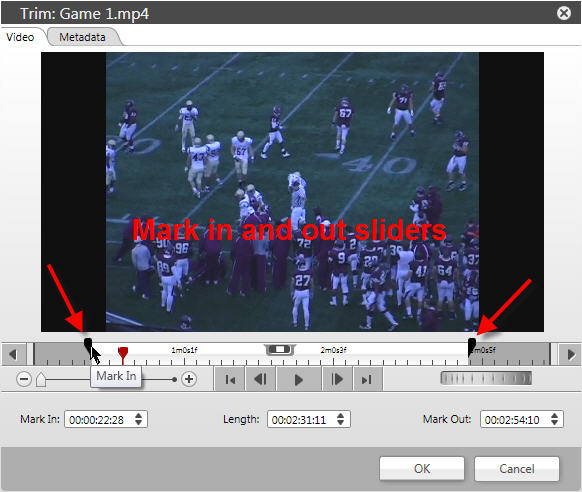
- To select a clip from the movie, right-click on the movie in the storyboard, and choose trim Video

- Using the bars on either end of the toolbar you can choose when the clip should start and end. You can play/pause to fine-tune their placement.
- To add another clip from the same movie drag your movie from the list down to the storyboard and adjust that movie for the next clip as in step 9. This can be done as many times as needed.

- Clips can be rearranged in the timeline by dragging them around in the storyboard.
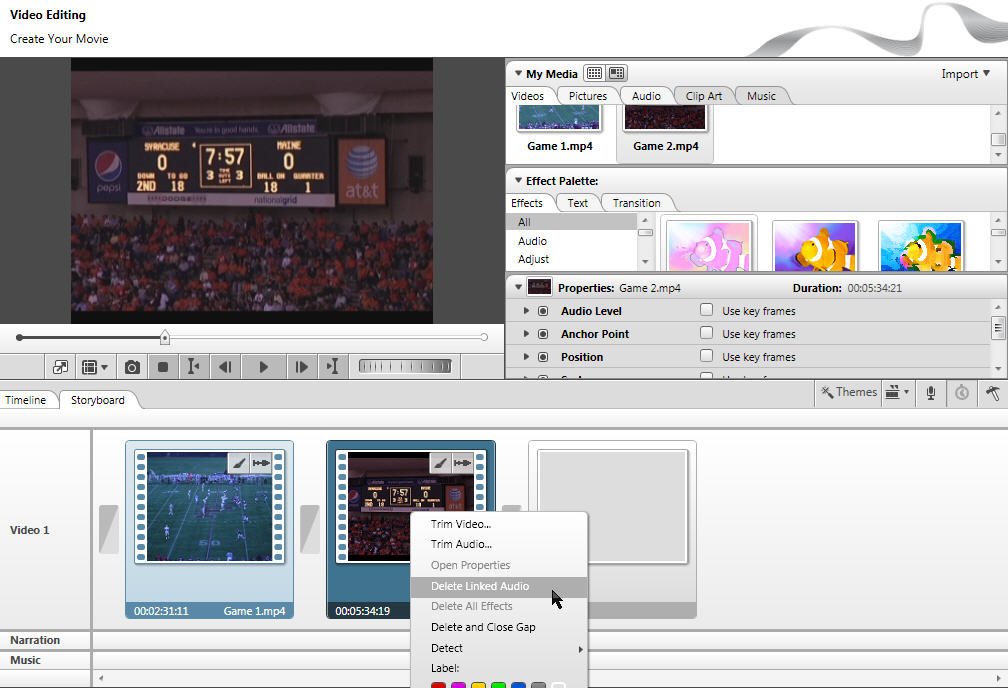
- If your movies have sound that you don't want competing with your voice-over, you need to right-click on each one and choose delete linked audio.
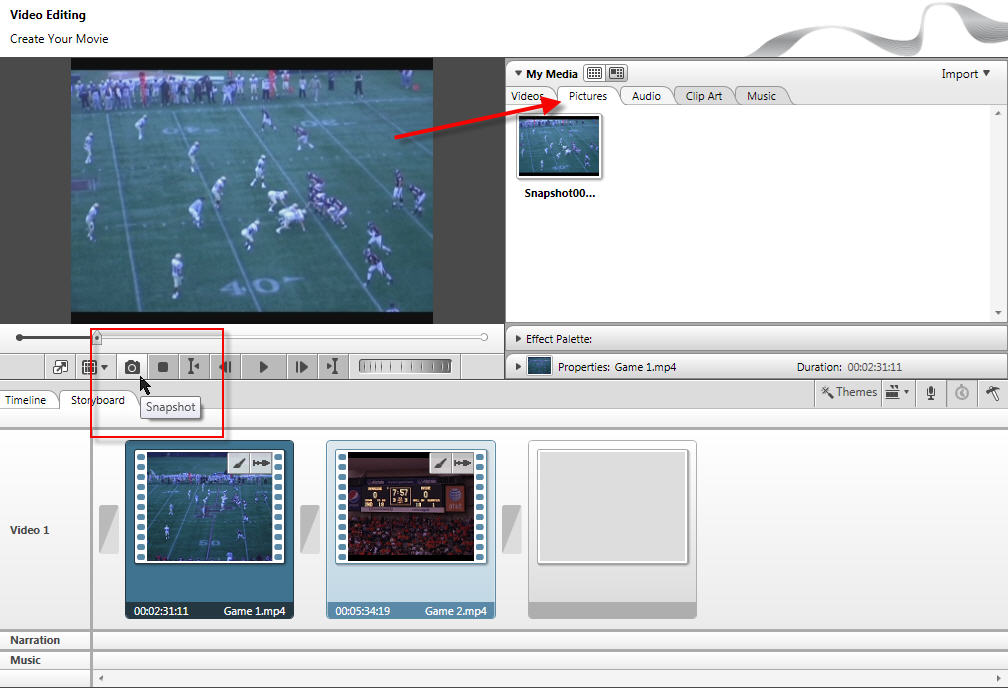
- To create a snapshot of the video to use as a pause for voice-overs, play the video in the top left corner and pause at the correct location. The press the snap shot button. It will show up in the My Media section in the top right corner under the pictures tab.
- To use the snapshot as part of a voice-over
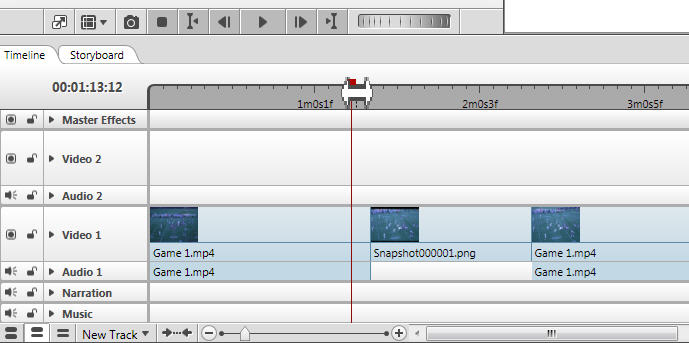
- Leave the video in the position it was in when you made the snapshot and Switch to the Timeline View tab
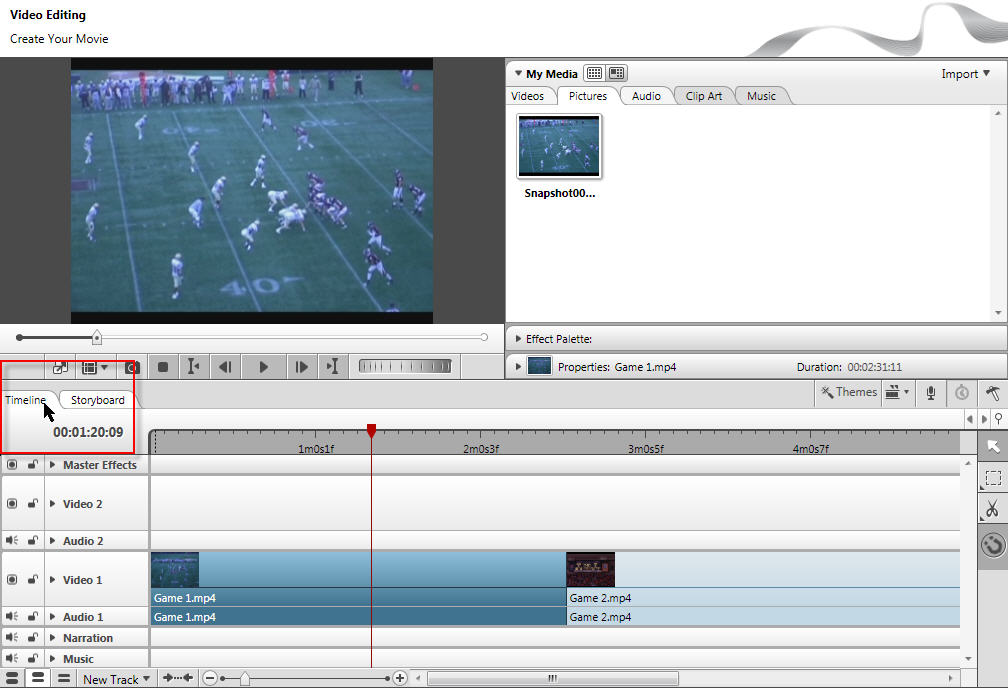
- Choose the cutter tool on the right

- Bring your mouse to the red position marker over the video and it should snap into place. Click to cut the clip in to two clips
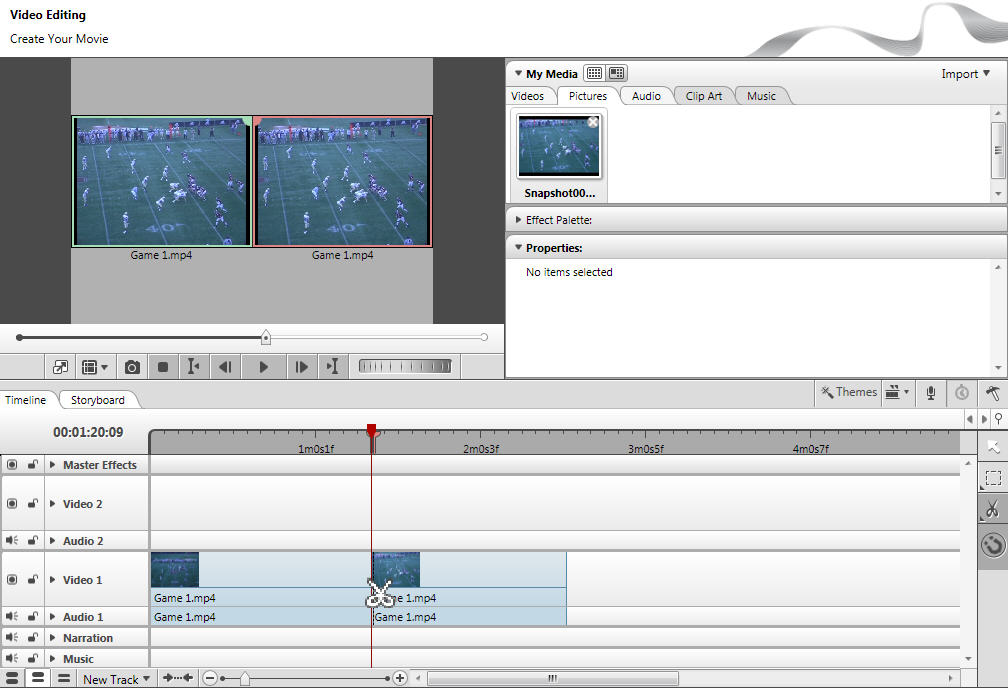
- Click on the selection tool icon on the left
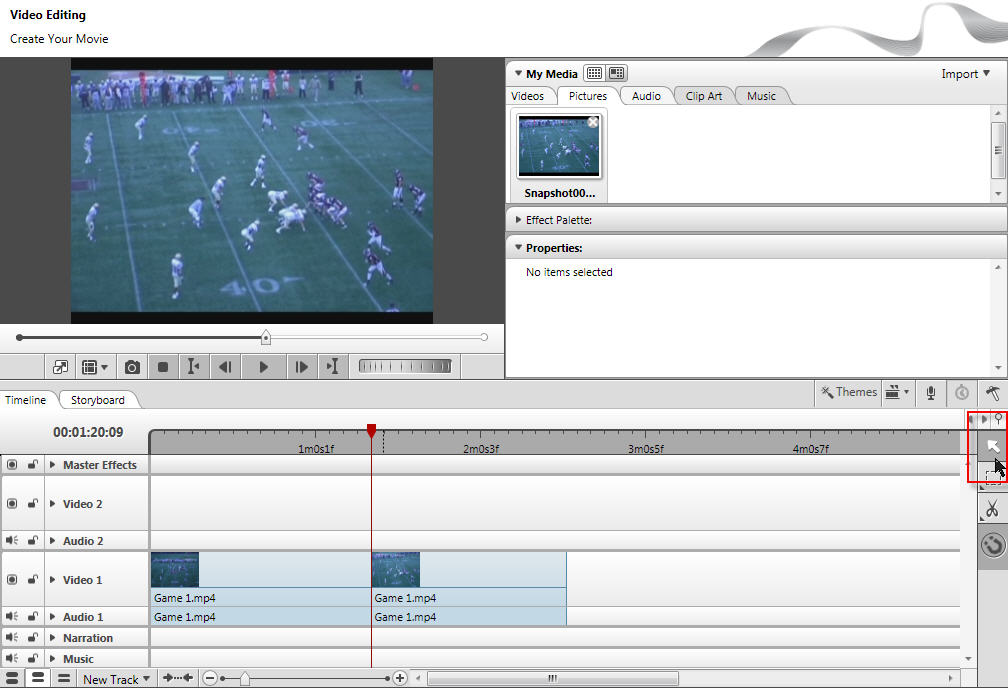
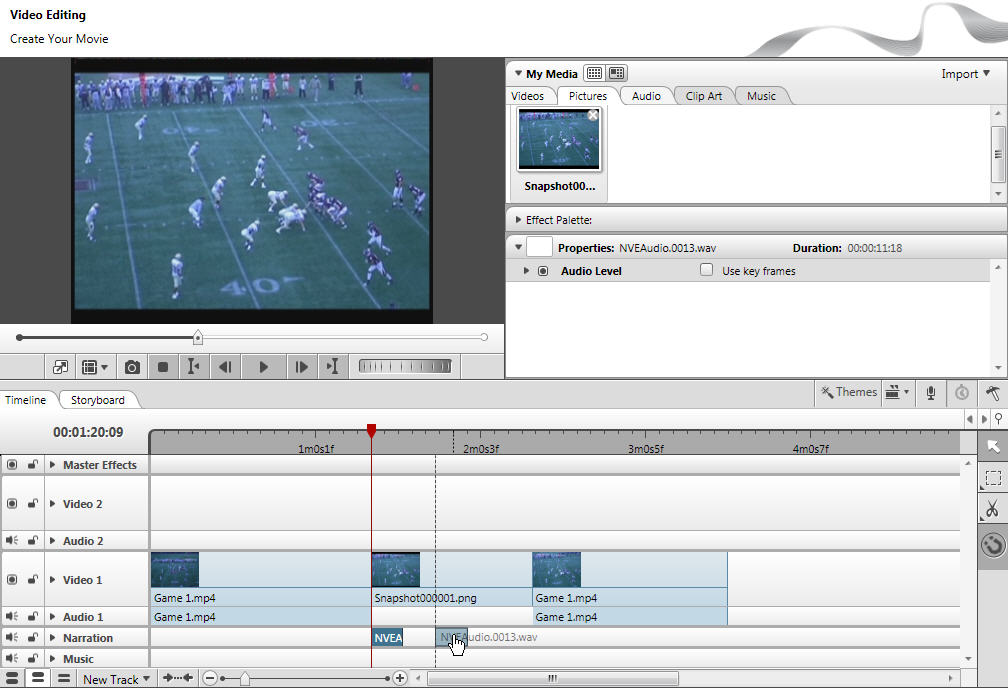
- Click on the newly created clip on the right and slide it to the right(1) to make room for your freeze frame snapshot. Then drag the snapshot down to the video timeline(2). You can click and drag on the right side of the snap shot to extend how long it lasts(3).
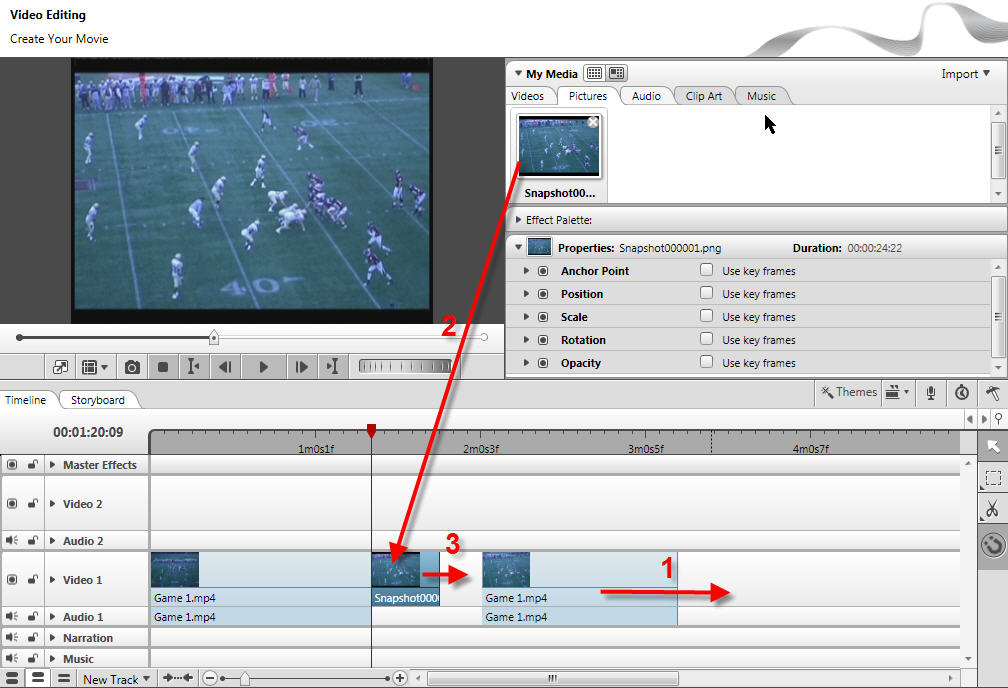
- Click here to see a brief video that shows what that process looks like.
- Leave the video in the position it was in when you made the snapshot and Switch to the Timeline View tab
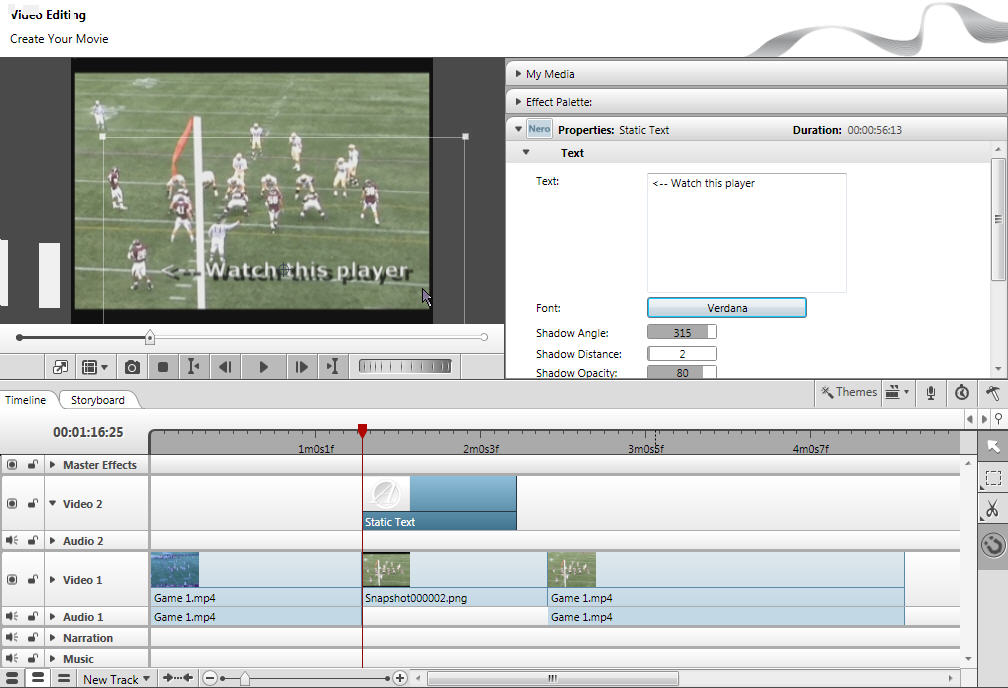
- To Add titles and arrows to your snapshots
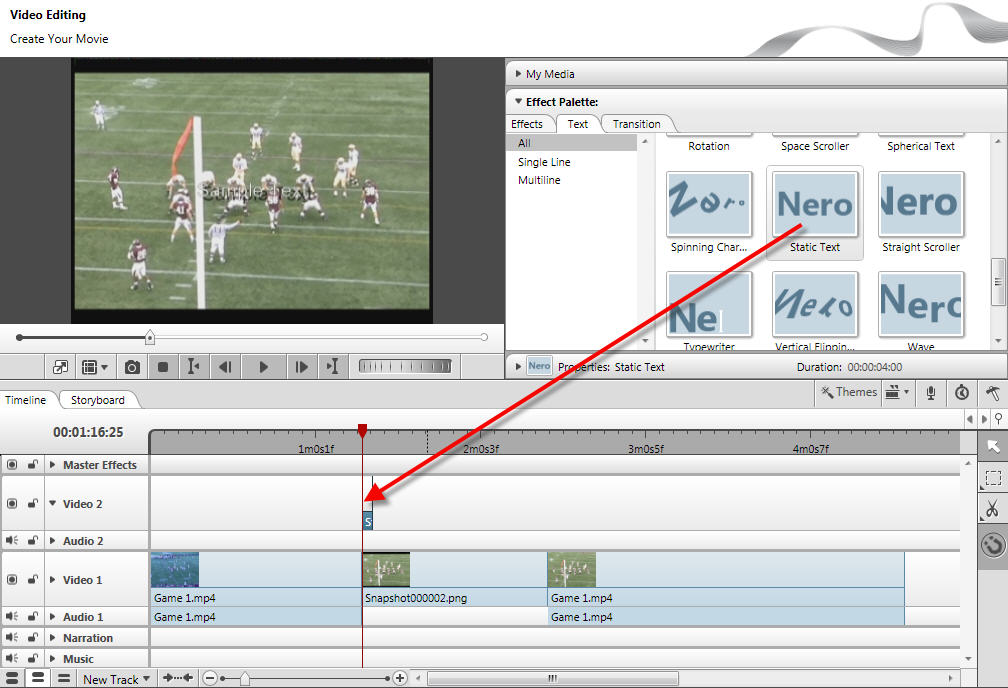
- Drag the position indicator to where you'd like the graphics to show up
- Make sure your videos are on track Video 1, if they are not, just drag them down to it. Video tracks work like layers where the top most one covers what is below it, only allowing the underneath through where it is transparent.
- In the effect Palette (click the triangles to hide/show items) in the "Text" tab, drag the Static Text box to the timeline in the track above your video
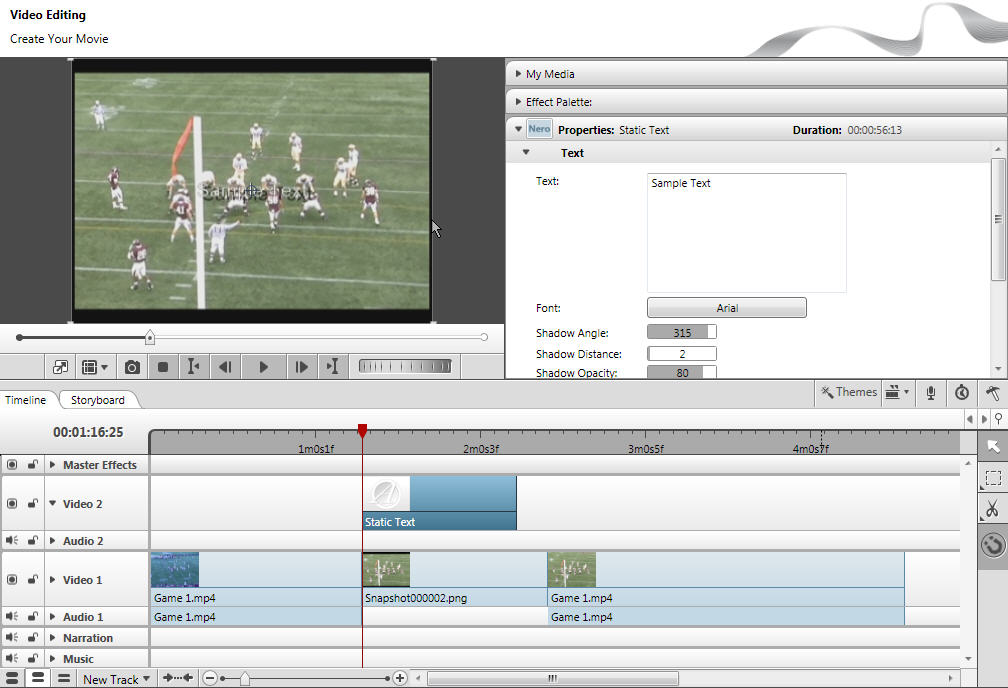
- Drag the Static Text box you created on Video Track 2 track and stretch out its duration like you did with the freeze-frame.

- In the preview window in the top left, click on the sample text. In the properties window on the right you can change the content and appearance of the text.
- Drag the position indicator to where you'd like the graphics to show up
- Clicking on the video in the upper left will allow you to resize, rotate and reposition your text
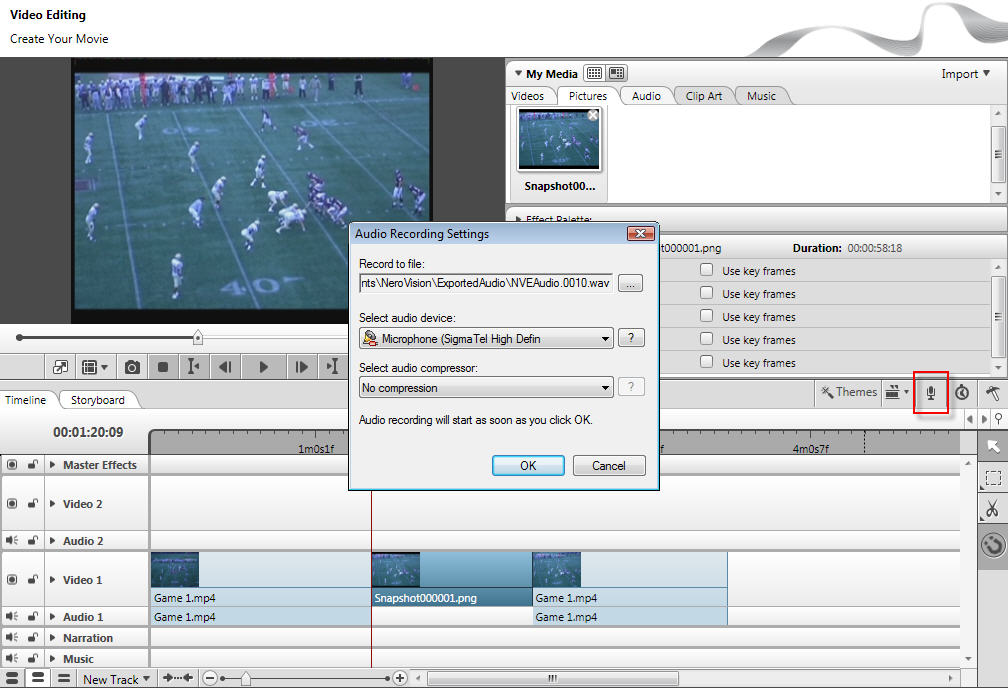
- To record a voice-over, you will want to make sure your microphone is plugged into your computer and you have your speakers turned off.
- Click on the "Show timeline" tab
- Drag the position marker a little bit to the left of where you want to start your voice-over to give you time to get ready.
- Press the record audio button, make sure your speakers are off and that the recording device listed is your microphone then press OK on the dialog box that pops up. Begin your voice-over.
- When done with your voice-over press the stop button as seen below.
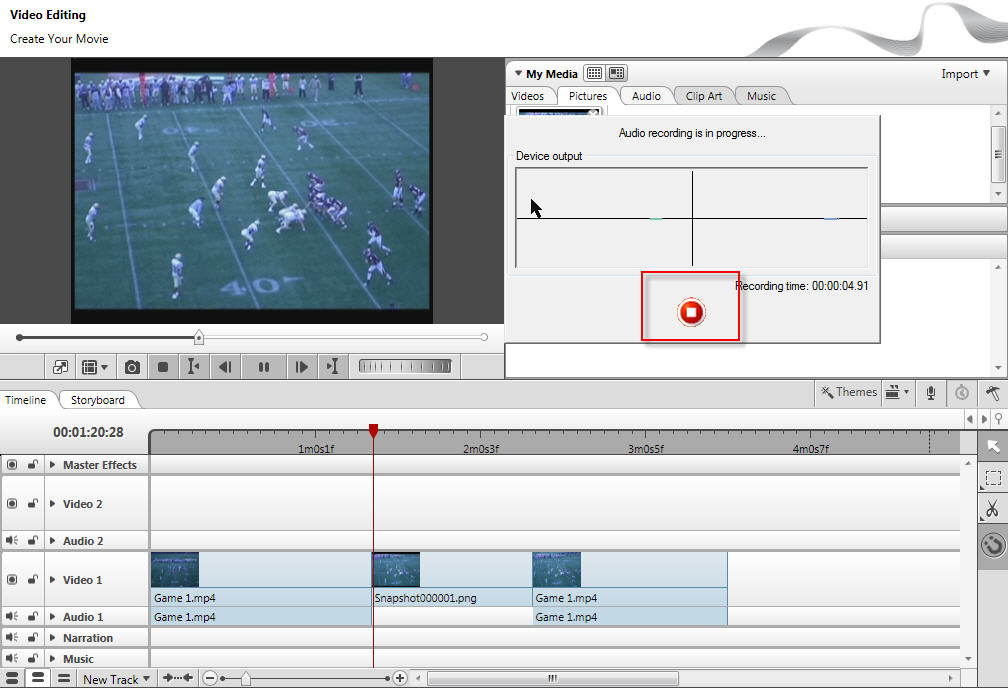
- If you make a mistake, you can delete the audioclip from the timeline and re-record it.
- You can adjust the position of the voice-over by dragging left and right as needed.
- You can record individual voice-overs by dragging the position bar to the appropriate location and then repeating steps 15-17 as needed.
- Click on the "Show timeline" tab
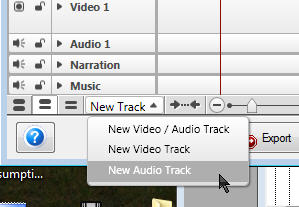
- To add addition tracks or layers of audio click on the new track button and choose "New Audio Track". You can then add music or other voice-overs for a layering effect of audio. Just make sure that track is selected before recording
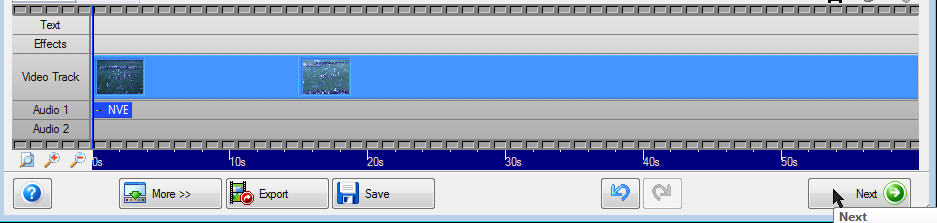
- When the project is complete, click on "Next". When prompted to save your project you should do so, just to be safe.
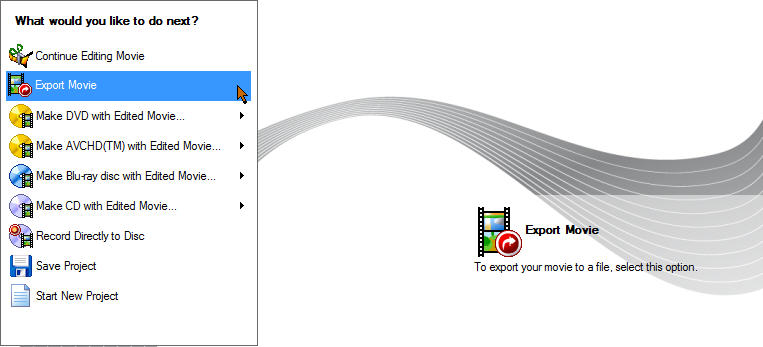
- You should first choose Save Project, and then choose "Export Movie" with instructions below or "Make DVD with edited Movie" Using the instructions here.
- Click and modify as below
- Export video to file
- AVC format
- PSP AVC (720x480) Profile (or ZEBRA after creating in step G below)
- Configure Profile
- Video Quality Bit rate can be adjusted to between 1500 and 2000 to find a balance of file size/image quality
- Browse to location of created movie
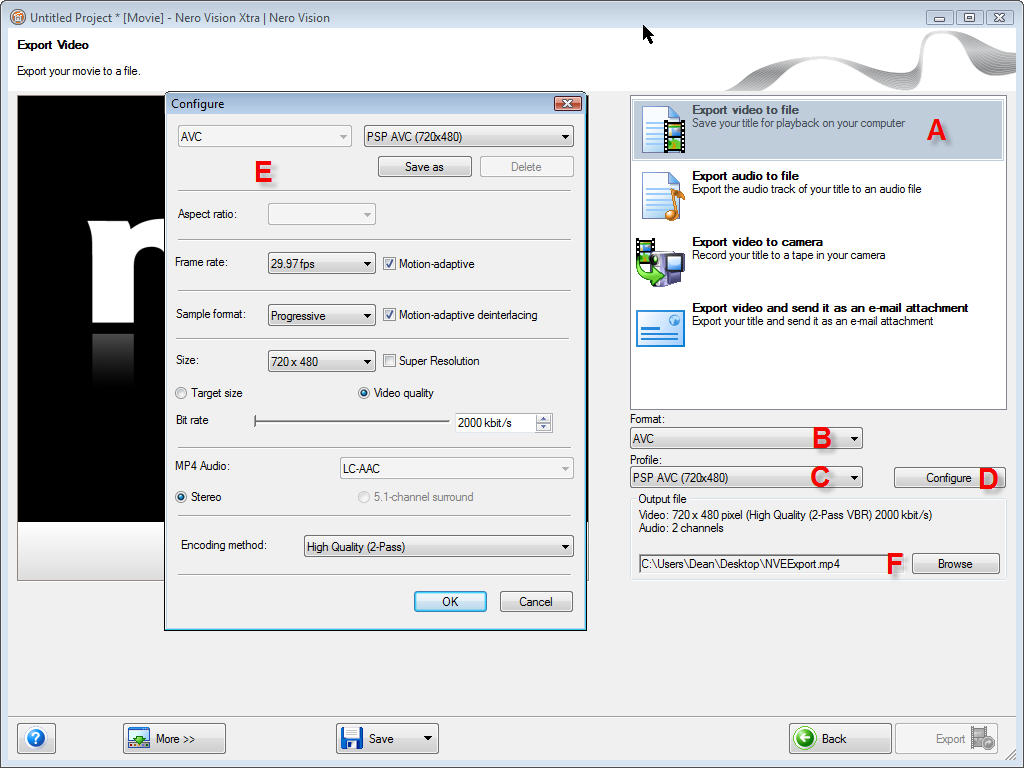
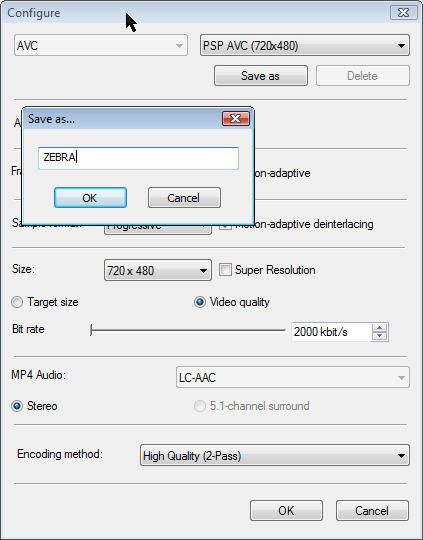
- In the configure box, you can choose to save as and enter ZEBRA for the name for quick future use in "C" above, allowing you to skip "D" and "E".
- Click on the export button and wait for it to finish
