 |
ZebraWeb.org Sports Officials Operations System™
"Empowering Sports Officiating™ " |
|
Edit a movie with voicover in Nero Vision
(single-click on hyperlinks
single-click on small images for larger version)
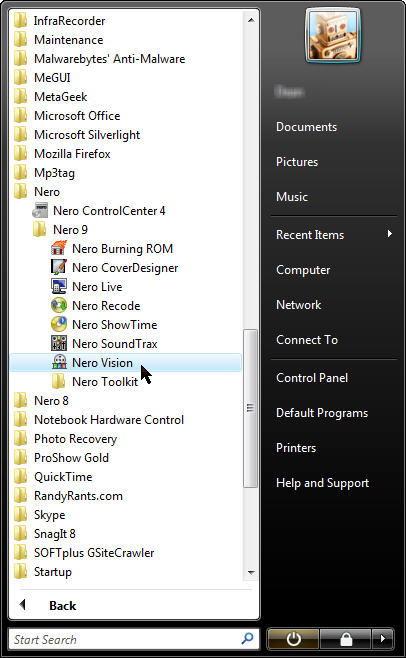
- From the Start Menu, launch Nero Vision
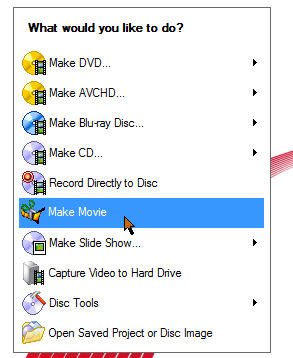
- Choose Make Movie:
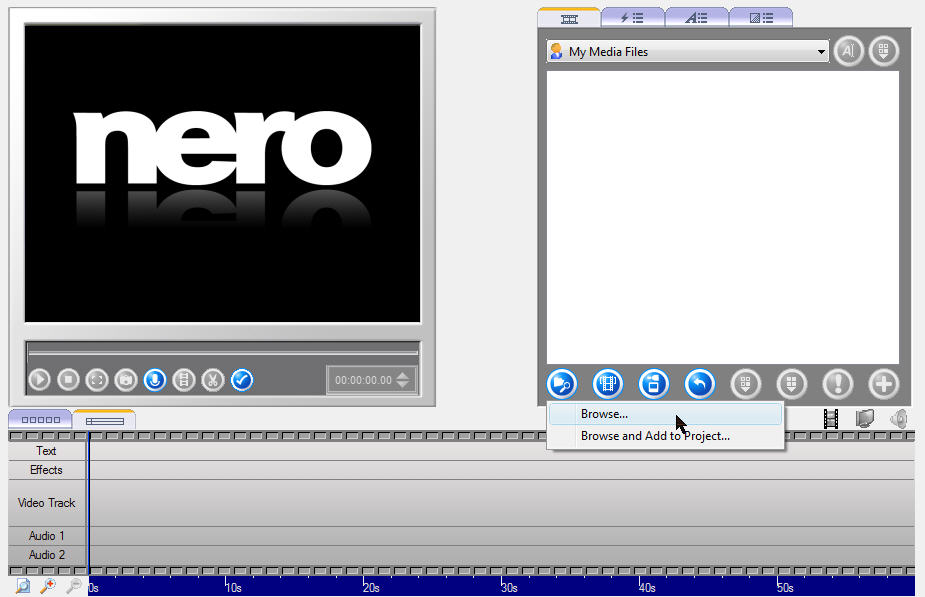
- If there are already media files in the list and you'd like to remove them (only from the project, not your computer), Right-click on them and choose Remove
- To add movies, click on the browse button and choose browse
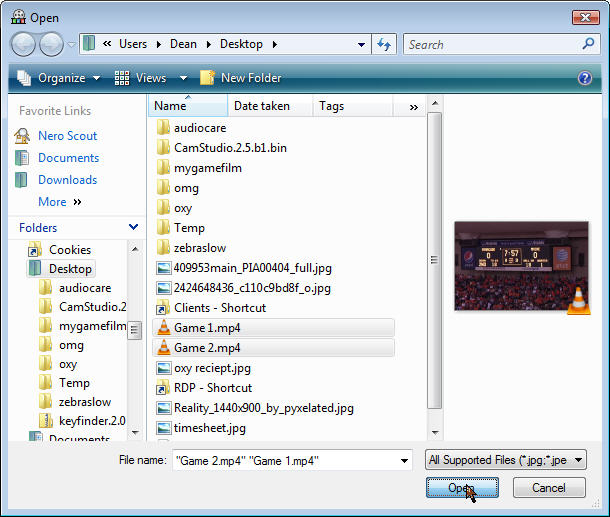
- Browse to where you saved your movies and choose them. Use ctrl-click to select multiples if needed. Click the "Open" button
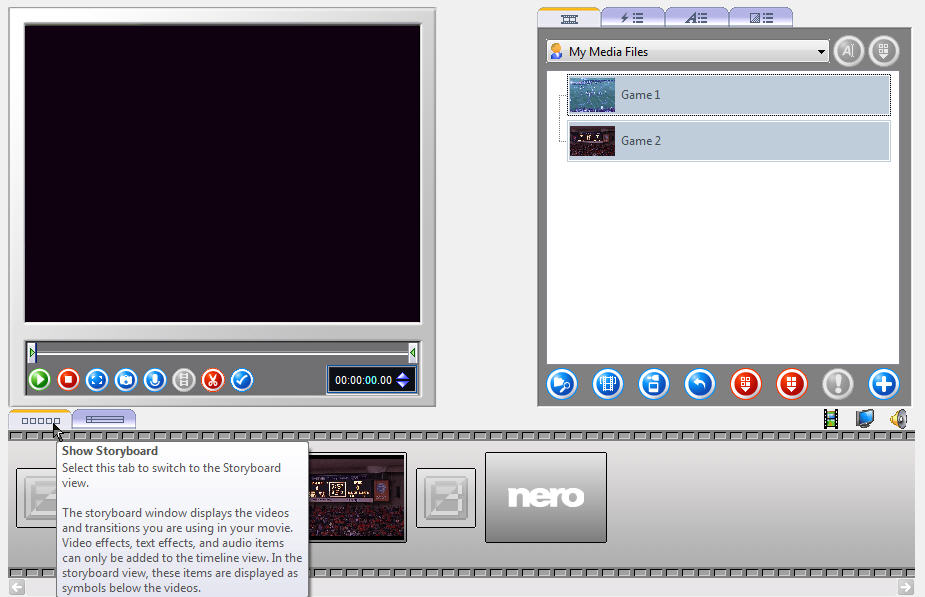
- Change to Storyboard view by clicking the "Show storyboard" tab
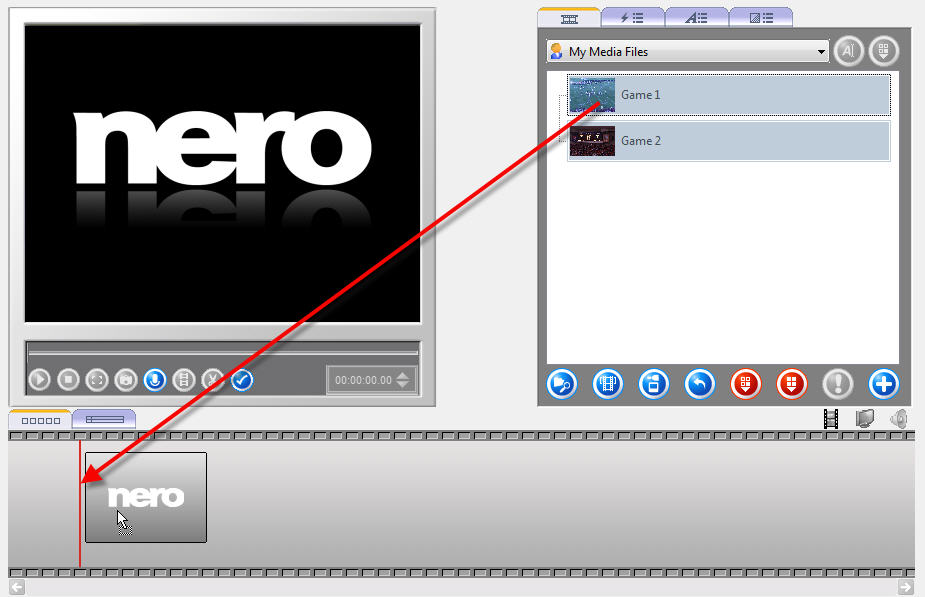
- Insert your first movie into the timeline by dragging it from the list to the storyboard
- To select a clip from the movie, click on the movie in the storyboard, it will show up in the top left display window
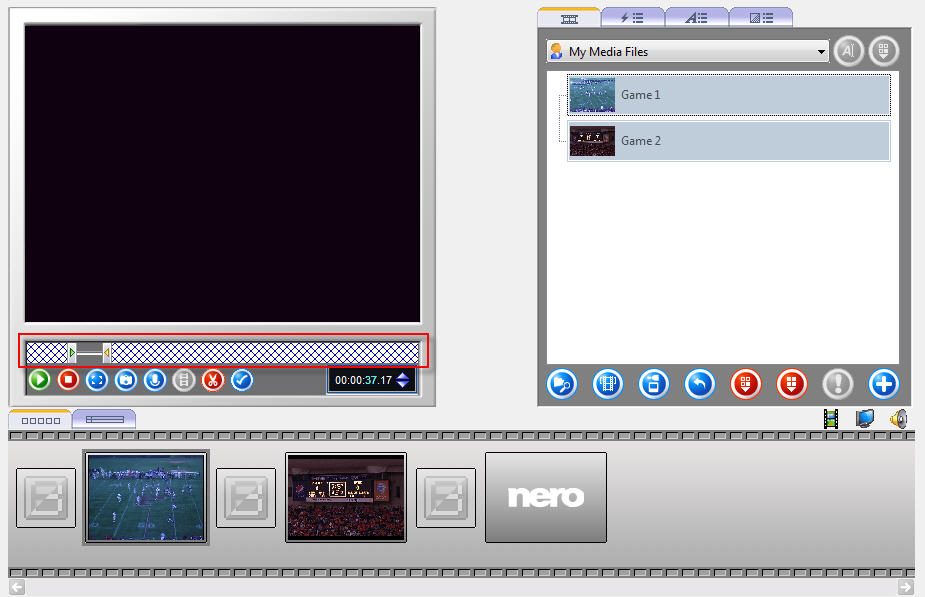
- Using the bars on either end of the toolbar you can choose when the clip should start and end. You can play/pause to fine-tune their placement.
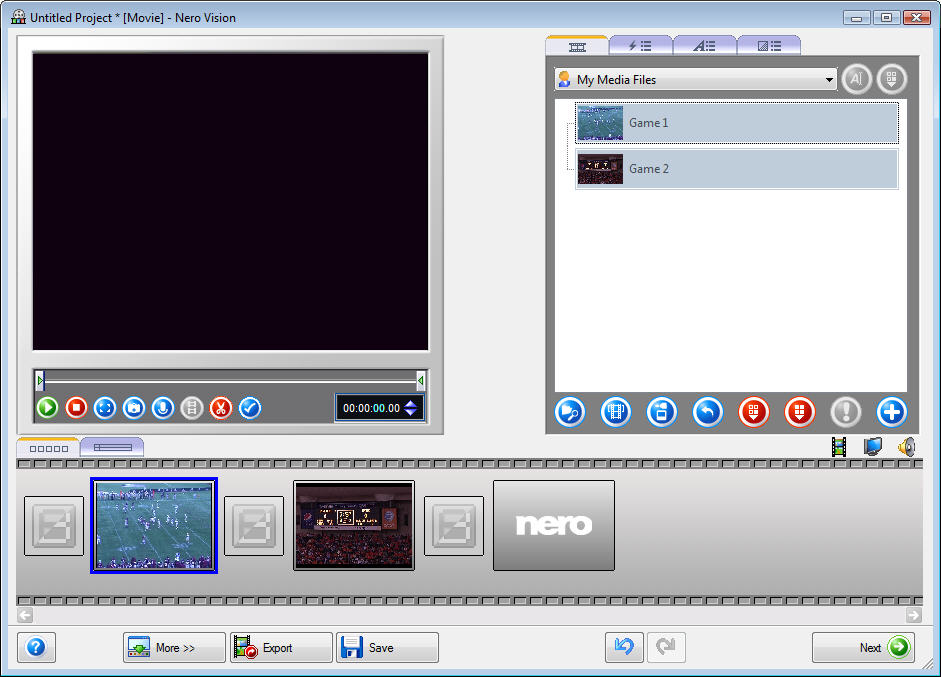
- To add another clip from the same movie drag your movie from the list down to the storyboard and adjust that movie for the next clip as in step 7. This can be done as many times as needed.
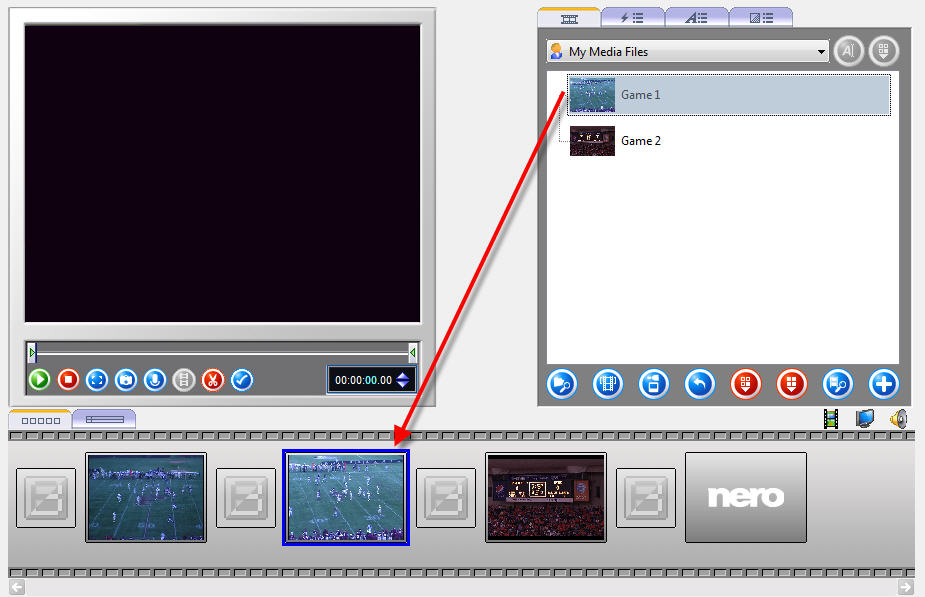
- Clips can be rearanged in the timeline by dragging them around in the storyboard.
- If your movies have sound that you don't want competeing with your voiceover, you need to right-click on each one and choose properties.
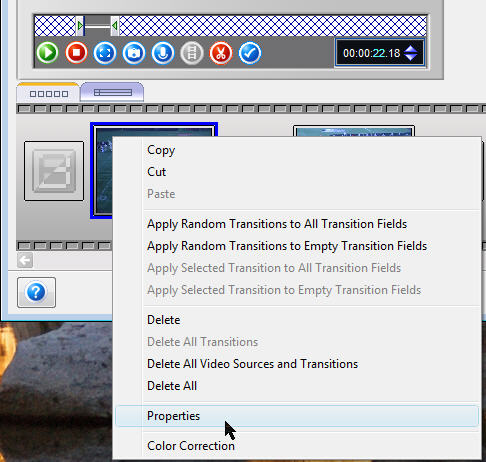
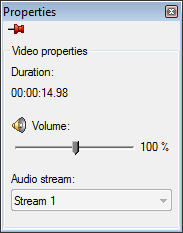
- This will pop open a window where you can drag the volume slider to zero. You will need to do this for every clip.
- To record the voiceover, you will want to make sure your microphone is pluged into your computer and you have your speakers turned off.
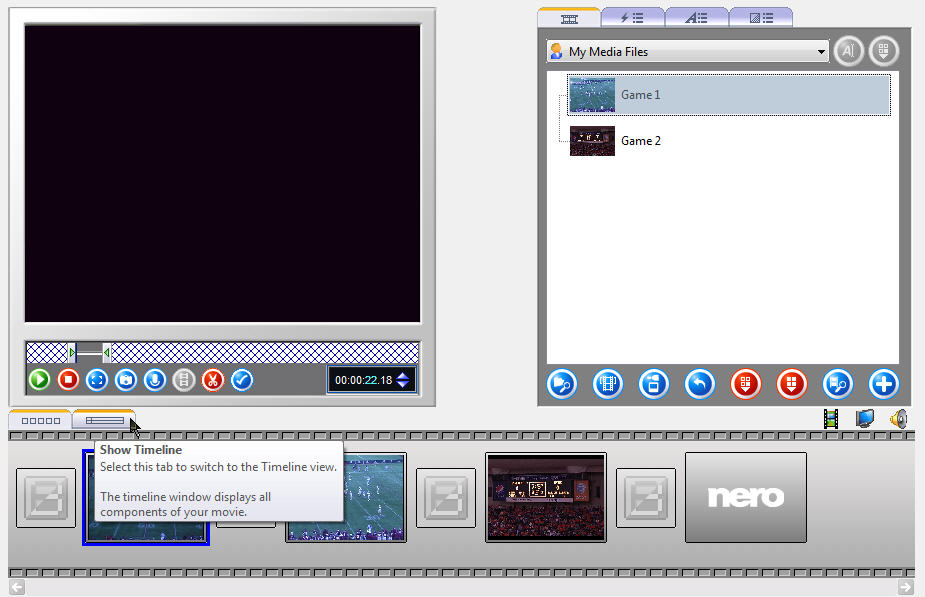
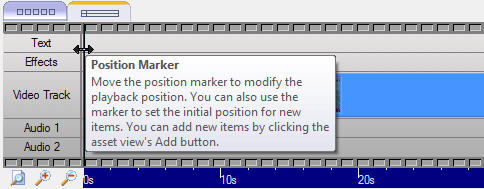
- Click on the "Show timeline" tab
- By defualt the position marker should be at the begining, but if it's not, you will want to drag it there
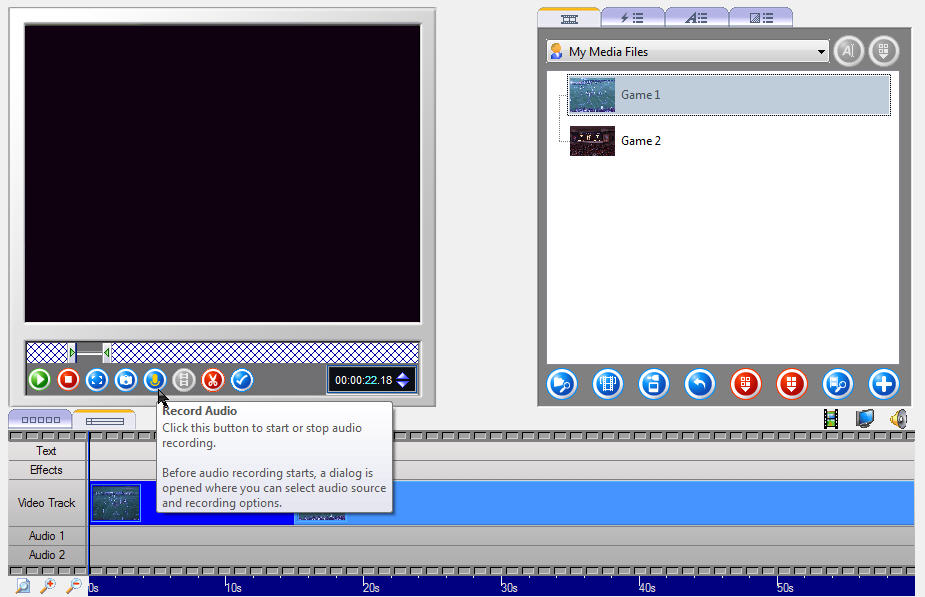
- Press the record audio button
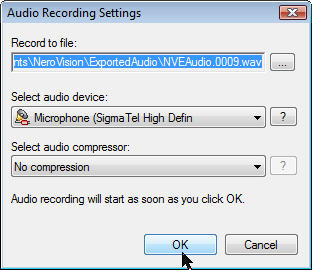
- Make sure the audiosource is your microphone and click OK
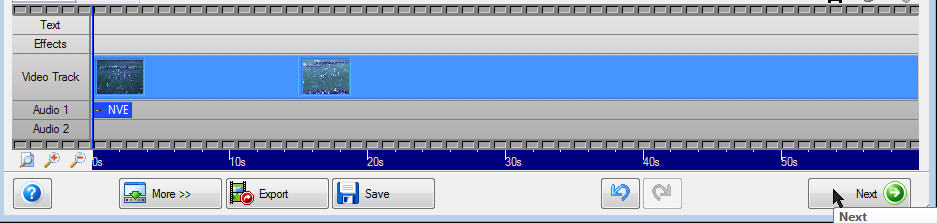
- Begin recording your voiceover. If you make a mistake, you can delete the audioclip from the timeline and re-record it.
- You can record individual voiceovers by dragging the position bar to the appropriate location and then repeating steps 15-17 as needed.
- When the project is complete, click on "Next"
- You should first choose Save Project, and then choose Export Movie
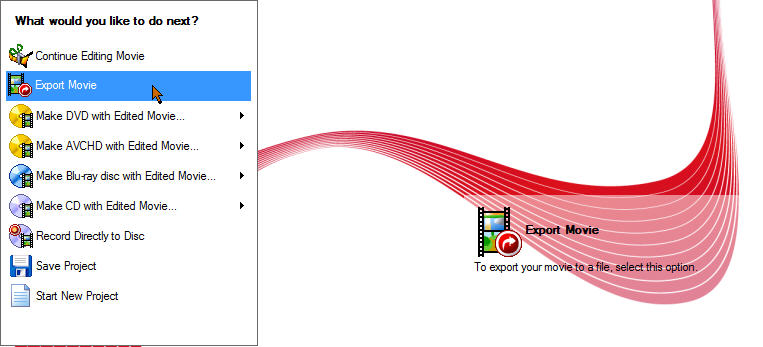
- Click and modify as below
- Export video to file
- Nero Digital format
- Nero Digital Standard Profile
- Configure Profile
- Video Quality Bit rate can be adjusted to between 1500 and 2000 to find a balance of file size/image quality
- Browse to location of created movie
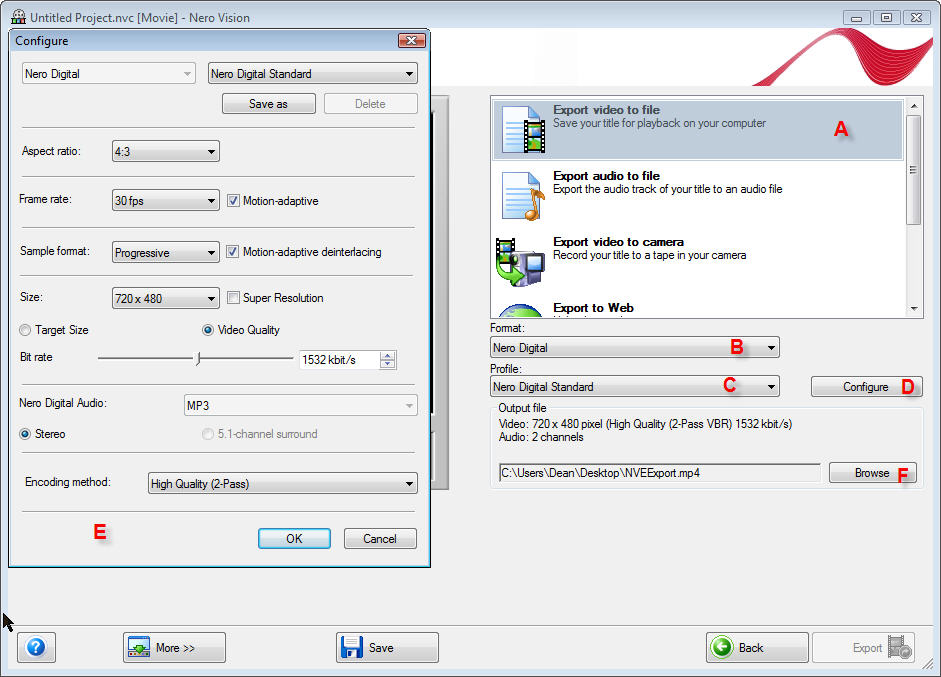
- Click on the export button and wait for it to finish
